

What to write in the text box for the best video
One text box in Step 1 of the Create Wizard does more to shape your finished video than every dropdown on the page combined. Fill it well and the pipeline turns it into a publish-ready video — script, voiceover, scenes and all. Fill it badly and you will feel it in every phase. This guide is about that box: how its job flips with the Content Type you picked, what detail genuinely helps the AI, and what is just noise — with before/after examples you can copy.
Watch an article go in and a branded video come out — the short version of this guide (1:30).
The box you are about to fill in
Reach Step 1 — Content & Style — pick a Content Type, and the matching input field appears beneath it. That field is the main content text box, and it is the single most consequential thing you type in the entire wizard. Every later phase is built from it: the Phase 1 storyboard, the narration the voiceover reads, the words that land on screen. Get the box right and the pipeline has real material to work with; get it wrong and no dropdown downstream can rescue it.
The mistake almost everyone makes is treating the box as one fixed thing. It is not. A Topic field and an Article field look identical and behave like opposites — one the AI expands, the other it compresses. Internalise that single distinction and the rest of this guide is just detail.

The box changes its mind with the Content Type
The wizard has nine content types. They split into three jobs the box can do, and your input length and detail should match the job — not your habit.
| Content Type | What the box wants | What the AI does with it |
|---|---|---|
| Topic / Idea | A tight phrase — a few words | Expands. It invents the structure and writes from scratch. |
| Bullet Points / Outline | The key beats, one per line | Expands. It fills in transitions and detail around your beats. |
| Tutorial / How-To Steps | Numbered steps in order | Expands. It narrates each step and keeps your sequence. |
| Article / Blog Post | The full source text, pasted in | Distills. It compresses your article into video pacing. |
| Product Information | Specs and description | Distills. It selects the selling points worth showing. |
| Pre-written Script | Your exact narration | Keeps it. Little rewriting — see the next section. |
The rule of thumb: if you chose an "expand" type, less is more — give a sharp phrase, not a paragraph. A bloated Topic field confuses the AI about what the video is actually about. If you chose a "distill" type, give it everything — the more complete the source article, the better the AI judges what to keep and what to cut.
Common error: pasting a whole article into a Topic / Idea box. The AI treats every sentence as a thing to expand on and the video sprawls. If you have a full article, switch the Content Type to Article / Blog Post so the box's job flips to distillation.
Detail that genuinely helps — and detail that is noise
For an "expand" type, a few words is the floor, not the ceiling. You can add detail, but only the kind the AI cannot guess. Useful additions:
- Audience and intent — "for first-time investors", "to drive sign-ups". This tells the AI what success looks like.
- Key facts that must be right — a statistic, a price, a date, a product name spelled exactly.
- Must-mention points — "must cover the 30-day refund". The AI will not skip these.
- What to avoid — "do not compare to competitors", "no jargon".
Noise — things that do not change the output, or belong in a dropdown instead:
- Tone words — "make it exciting", "keep it professional". The Tone dropdown does this. Typing it in the box just dilutes the topic.
- Format instructions — "make it a YouTube Short". The Format and Platform dropdowns own this.
- Filler politeness — "please create a nice video about…". Strip it; lead with the subject.
- Restating the obvious — repeating the Video Title verbatim.

Let the dropdowns carry the voice
Step 1 has a row of Style controls: Video Style, Video Tone, Target Audience, and Experience Level. These shape how the video sounds and who it talks to. You do not need to describe any of that in the text box — picking the dropdowns does it more reliably.
This is freeing: it means the box can be purely about subject and substance. Pick "Beginners" as the Experience Level and the AI already knows to avoid jargon — you do not write "explain it simply" in the box. If a dropdown has no option that fits, most of them offer a Custom choice with a short free-text field, which is the right place for tone instructions — not the content box.
Before and after
Two real examples, both for a Topic / Idea production.
| Weak input | Strong input |
|---|---|
| "Please make an exciting professional video about our software, something that looks really good for YouTube and gets people interested." | "How AcmeFlow cuts invoice approval from days to minutes. Audience: finance managers at mid-size firms. Must mention the free 14-day trial. Avoid naming competitors." |
| "compound interest" | "Why compound interest grows savings faster than people expect. Intent: motivate 20-somethings to start a retirement account early. Include the rule-of-72 shortcut." |
The weak inputs are either empty of substance or full of tone and format words a dropdown should carry. The strong inputs name the subject, the audience, the intent, and one or two must-include facts — nothing else.
When you want the exact words: the Voiceover Script field
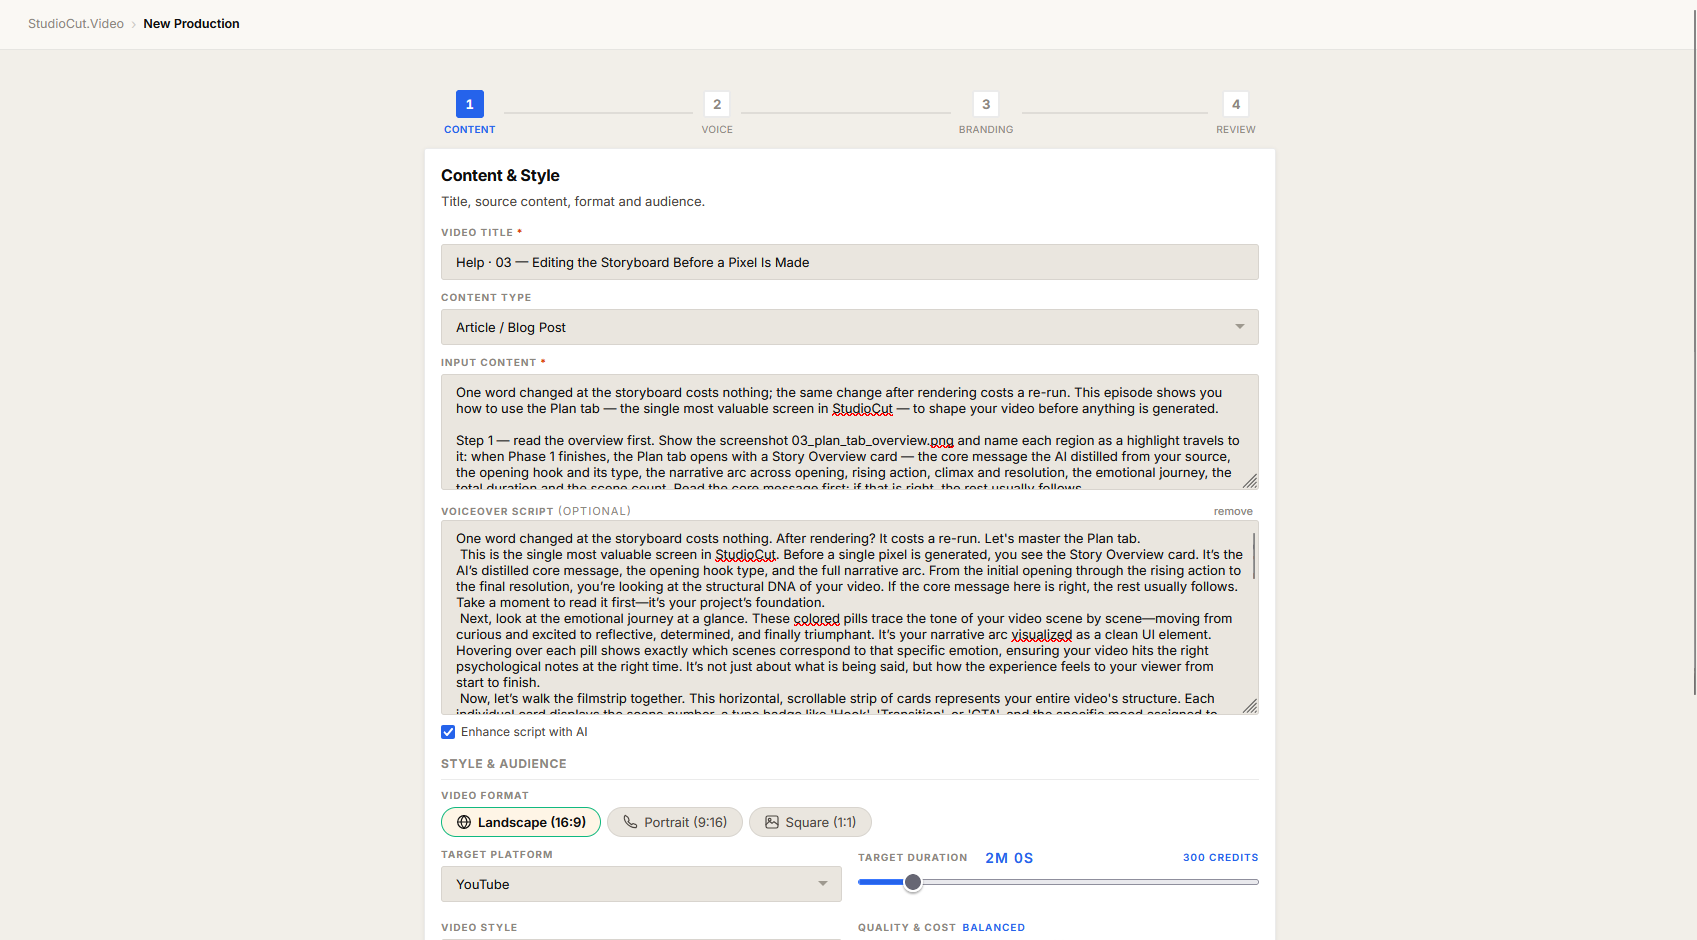
Sometimes you do not want the AI to write anything — you have the narration already, word for word. Step 1 has a separate optional field for that: Voiceover Script. It lives in Step 1, not Step 2, even though it is about audio.
Paste your exact narration there and the spoken track follows it. The content text box still drives the visuals and structure, but the Voiceover Script overrides what gets said. This is the most precise way to control wording — useful for legal copy, scripted ads, or brand lines that cannot drift.
Below that field is an Enhance with AI checkbox. Leave it off when your script must be reproduced verbatim. Turn it on when you have a rough draft and want the AI to polish cadence and emphasis without changing your meaning — handy if you wrote the script quickly and it reads a little flat.
A note for URL and RSS inputs
If you chose URL / Web Page or RSS Feed as the Content Type, the box behaves like a distill type — the AI pulls the page text and compresses it. One extra control appears beneath it: a Strip source content checkbox.
Tick it to discard page boilerplate — navigation menus, cookie banners, "related articles" lists, footers. With it on, the AI works from the real article body instead of being distracted by sidebar clutter. For most blog and news pages, leaving Strip source content ticked produces a cleaner, more on-topic video.
The one-sentence version: match the box to the Content Type — a tight phrase for expand types, the full text for distill types — add only audience, intent, and must-include facts, and let the dropdowns carry the tone.
Further reading
- How the nine input types work — the full overview of every Content Type and when to reach for each.
- The Create Wizard — a complete field-by-field reference for all four steps.
- How It Works — what happens to your text after you click Create.
Fill in one box, approve a finished video
You write the brief; the pipeline writes the script, records the voiceover, directs the scenes and renders it — and you sign off on the storyboard first. Start free and see what one well-written box produces.
Get Started Free