

Images, PDFs and media as input
A topic prompt tells the pipeline what to make a video about. Attached media tells it what raw material to build that video from — your product photo, your spec sheet, your one-page brief. The closer the pipeline works from your real assets, the more the finished, publish-ready video looks like your brand and not a stock-footage approximation of it. This tutorial covers the Step 3 Input Media drop zone: what it accepts, what each per-file setting does, and how to attach files so the AI uses them exactly the way you intend.
Where attached media goes in: Step 3
Every production runs through the same four-step Create Wizard, and attached media has one home: Step 3 — Branding & Media, in a panel called Input Media (Optional) beneath the brand fields. The "optional" is honest — a video built from a topic prompt alone is perfectly valid. But the moment you have real source material — a product photo, a PDF data sheet, a logo, a chart — this is the door it walks through, and using it is the difference between a video about your product and a video built from it.
The Input Media section gives you three ways to bring files in:
- Drop files here or click to browse — a drop zone that takes drag-and-drop or opens a file picker.
- From Library — opens an Asset Library modal so you can attach files you have already uploaded, including reusable logos and music.
- From Canva — opens a Canva picker to pull in a design directly. This requires the Canva integration to be connected on your account.
Files attached here are tied to this production. Files in the Asset Library are reusable across many productions — that is the difference between the drop zone and From Library.

What the drop zone accepts
The Input Media drop zone is deliberately strict. It accepts two families of files — images and documents — each with its own per-file size cap, plus a single cap on the total upload.
| Category | Accepted extensions | Per-file cap |
|---|---|---|
| Images | .jpg · .jpeg · .png · .gif · .webp · .svg · .bmp | 10 MB each |
| Documents | .pdf · .txt · .csv · .json · .xml · .doc · .docx · .xls · .xlsx | 5 MB each |
| Total upload | All attached files combined | 200 MB |
If a file is the wrong type or over its cap, the wizard rejects it at the moment you drop it and tells you why — nothing silently fails later in the pipeline.
Audio and video are not accepted here. The drop zone takes images and documents only. To use a music track, a voiceover recording, or B-roll footage in a production, upload it to the Asset Library first, then attach it through the From Library button. The Asset Library accepts a broader set of media — including audio and video — because assets there are built to be reused across many videos, while the drop zone is scoped to one production's source material.
The per-file media-item editor
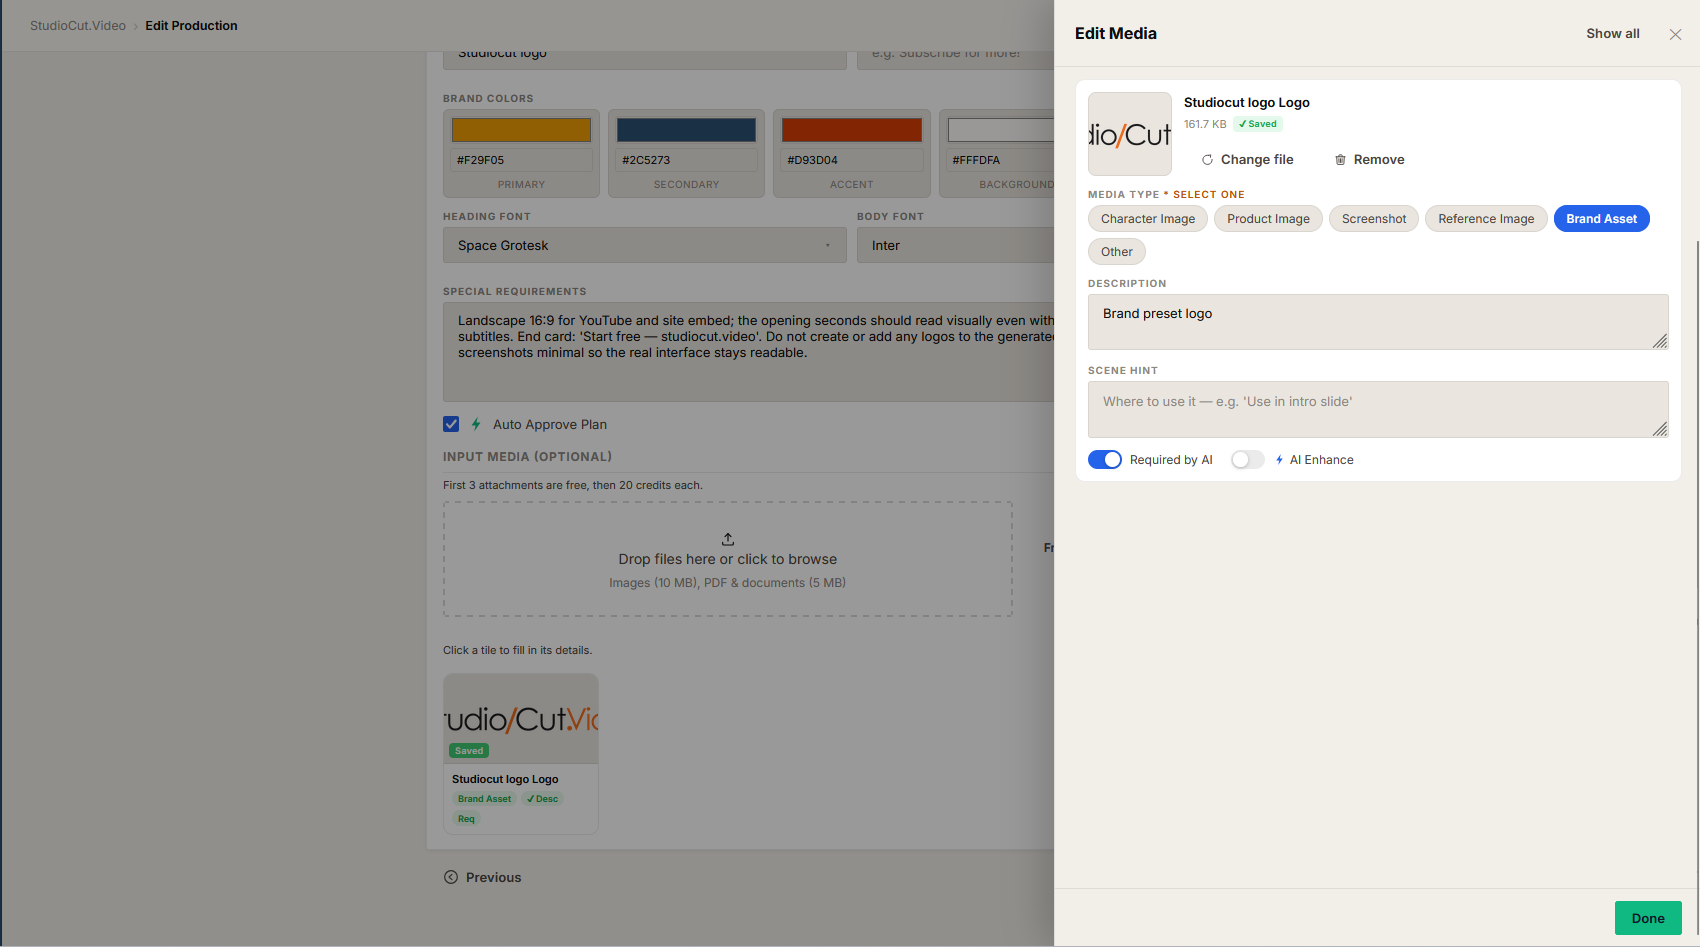
Attaching a file is only half the job. As soon as a file lands in the drop zone, a media-item editor appears for it below the zone. This is where you tell the AI how to treat each file. Every attached file gets its own editor card.
| Field | What it does |
|---|---|
| Name | A label for the file. Defaults from the filename. A clear name helps you keep multiple attachments straight, and it gives the AI a hint about what the file is. |
| Scene hint | Free text that binds the file to a particular part of the video — for example "Scene 2" or "the pricing comparison". Without a hint, the AI decides where the file fits; with one, you steer it. |
| Must-include flag | When on, the AI is required to use this file. When off, the file is treated as optional reference material the AI may or may not place. |
| AI-enhance flag | When on, the file is run through a cleanup pass before use — background removal, upscaling, or general tidy-up. |
| AI-enhancement instructions | Free text that directs the enhance pass — for example "Remove white background, upscale 2×". Only meaningful when the AI-enhance flag is on. |
The most under-used of these is the scene hint. If you attach a product photo and want it on screen during the feature walkthrough specifically, say so. A hint of "Scene 3 — feature overview" is the difference between the AI guessing and the AI knowing.
How a PDF or document becomes input
When you attach a PDF, the AI does not paste a picture of the page into your video. It reads the text content of the document. A product spec sheet becomes a set of facts the script can draw on; a one-page brief becomes context for tone and emphasis. The same applies to the other document types — .txt, .csv, .docx, .xlsx and the rest are parsed for their text and data.
Images attached as documents-style reference work differently: the AI can analyse an image to extract what is in it — a chart, a screenshot, a labelled diagram — and use that understanding when planning scenes. So a document attachment contributes information, while an image attachment can contribute both a visual asset and information about what the visual shows.
This is why the document path matters even though documents never appear on screen as files: they shape the script. If a fact must be correct in the video, putting it in an attached PDF is more reliable than hoping the AI recalls it from a short topic prompt.
PDF / Image Upload content type vs attaching media as input
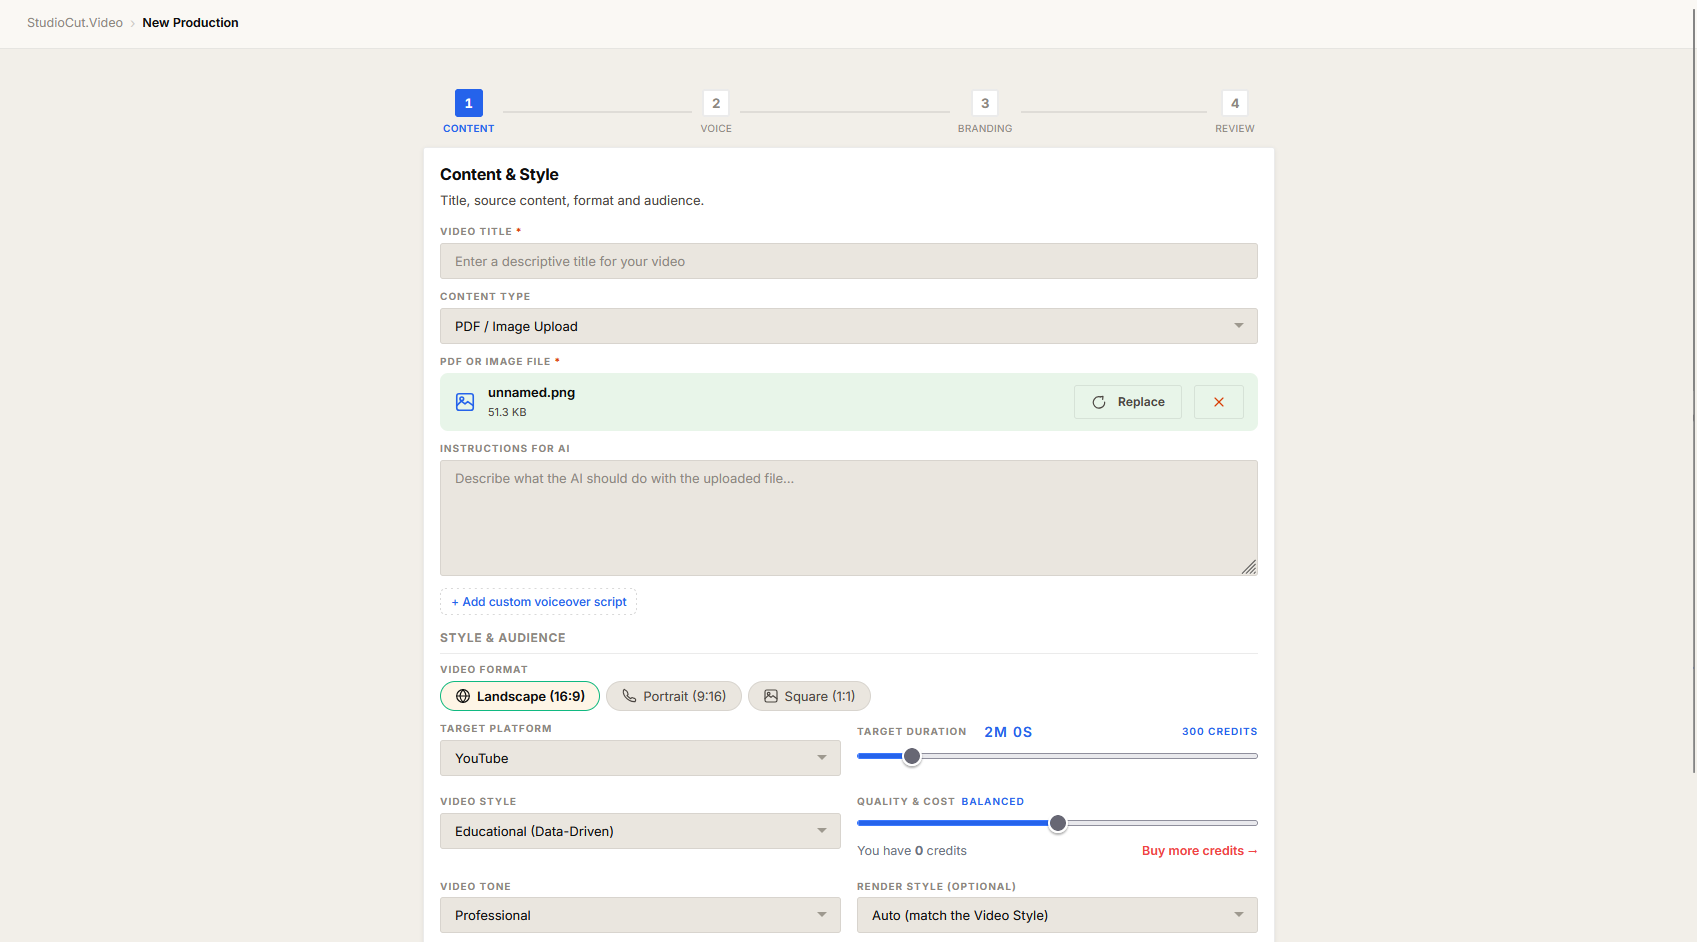
There are two different places a PDF or image can enter a production, and they are not the same thing:
| PDF / Image Upload content type (Step 1) | Input Media attachment (Step 3) | |
|---|---|---|
| Role | The primary source the whole video is built from. | Supporting material layered on top of another source. |
| How many | One PDF or one image. | Many files, within the 200 MB cap. |
| When to use | The document is the brief — make a video of this report. | You have a topic or script, plus assets to enrich it. |
Choose the PDF / Image Upload content type in Step 1 when the file is the entire basis for the video. Use the Step 3 Input Media drop zone when you already have a topic, article, or script and simply want the AI to fold in extra photos, charts, or reference documents.
Pulling images out of a web page
The URL / Web Page content type has its own way of bringing in media. When you pick it in Step 1, two extras appear next to the URL field:
- Images to extract — a number input, 0 to 10. It sets how many images the AI should pull from the page.
- Import Images from URL — the action that performs the scrape and brings the extracted images into the production as input media.
This is useful for blog posts and articles that have a hero image, diagrams, or product shots you would otherwise have to download and re-upload by hand. Set the count to match how many images on the page are actually worth using — leave it at 0 if the page's images are decorative and you only want the text.
Getting the most out of attached media
A few habits make attached media reliably useful instead of hit-or-miss:
- Name files for what they are, not what the camera called them. "Product hero shot" beats "IMG_4821" — for you and for the AI.
- Use scene hints whenever placement matters. If a file has a right answer for where it belongs, say so rather than leaving it to chance.
- Reserve the must-include flag for files that truly must appear. Flagging everything removes the AI's room to make good editing choices. Flag the logo and the key product shot; leave optional reference images unflagged.
- Put facts in documents. If exact numbers, names, or claims must be right, attach them in a PDF or text file rather than relying on a short prompt.
- Enhance only what needs it. The AI-enhance flag is worth turning on for a logo with a white background or a low-resolution photo. Clean, transparent, high-resolution files are best left untouched.
- Reuse through the Asset Library. A logo or music track you will want again should live in the Asset Library, attached via From Library — not re-uploaded into the drop zone every time.
The one-sentence version: the Step 3 drop zone takes images and documents (not audio or video) as a production's source material — and the per-file editor, especially the scene hint and must-include flag, is how you turn an attached file into input the AI actually uses on purpose.
Further reading
- The Create Wizard — every field of all four steps, in order.
- Asset Library — the reusable media bank, including audio and video.
- Brand Library — logos and music tied to a full brand kit.
Build the video from your own assets
Drop in your product shots, spec sheets and brand files, and let the pipeline produce a finished video that actually looks like yours. Start free — no credit card.
Get Started Free